The time is too early o’clock, on a weekday morning, and I’m sitting down with my boy watching Numberblocks. (It’s a pretty good show for 1yr olds – you should check it out if you’ve got a little one who likes to get up early to watch TV!!)

The idea of the show is to teach kids numbers by combining and pulling apart blocks in various ways. It’s a nice visual way to teach sums.
Anyway, it dawned on me that this is exactly how I have been visualising my trades. By breaking down my trades into smaller units I can – ideally – average in at a better price, slightly increase the position size (whilst maintaining the same level of risk) and be more flexible with my exits.
It also allows me to participate in a trade in the event it just runs. I’ll only have half the position on, but I’ll be participating. Here’s how I see the entries and exits working.
Sizing trade entries
Here’s a typical entry example (shorting the market).
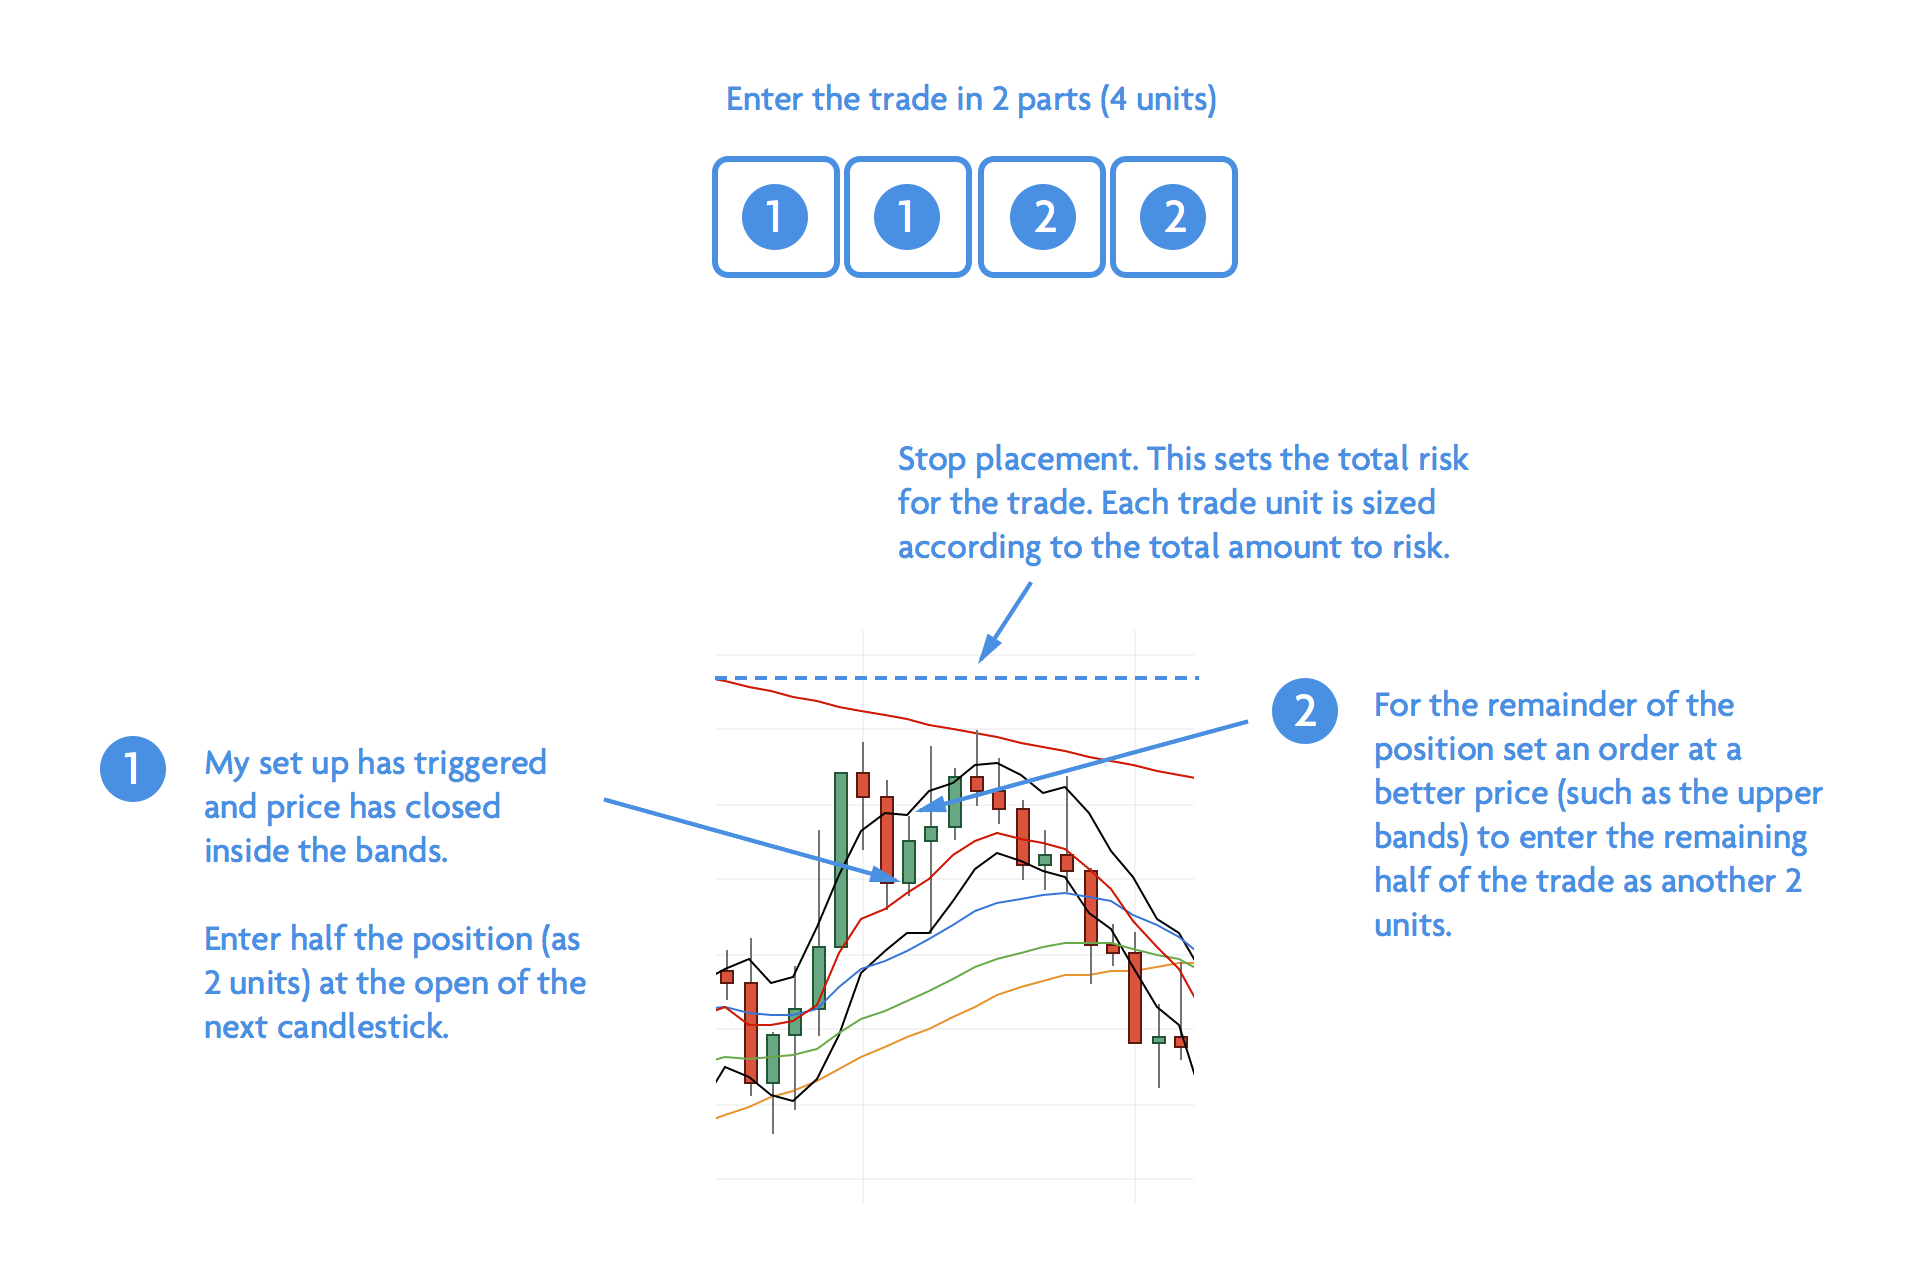
Entering a trade in a number of units
To summarise, the entry is broken down into two parts:
- As soon as the setup is confirmed, place half the trade at the open of the next candlestick
- Wait for a better price to place the remainder of the trade. This could be the band, an MA, a % amount retracement of the previous bar, etc etc.
The idea is to break down the trade into a number of smaller units so you have flexibility to go for multiple targets.
Closing the trade
The trade will close in one of three ways:
- A total stop out. 1% of the account is lost
- A partial stop out. 0.75% (or less) of the account is lost
- Winner winner chicken dinner.
Here’s an ideal example of how I might close my trade.
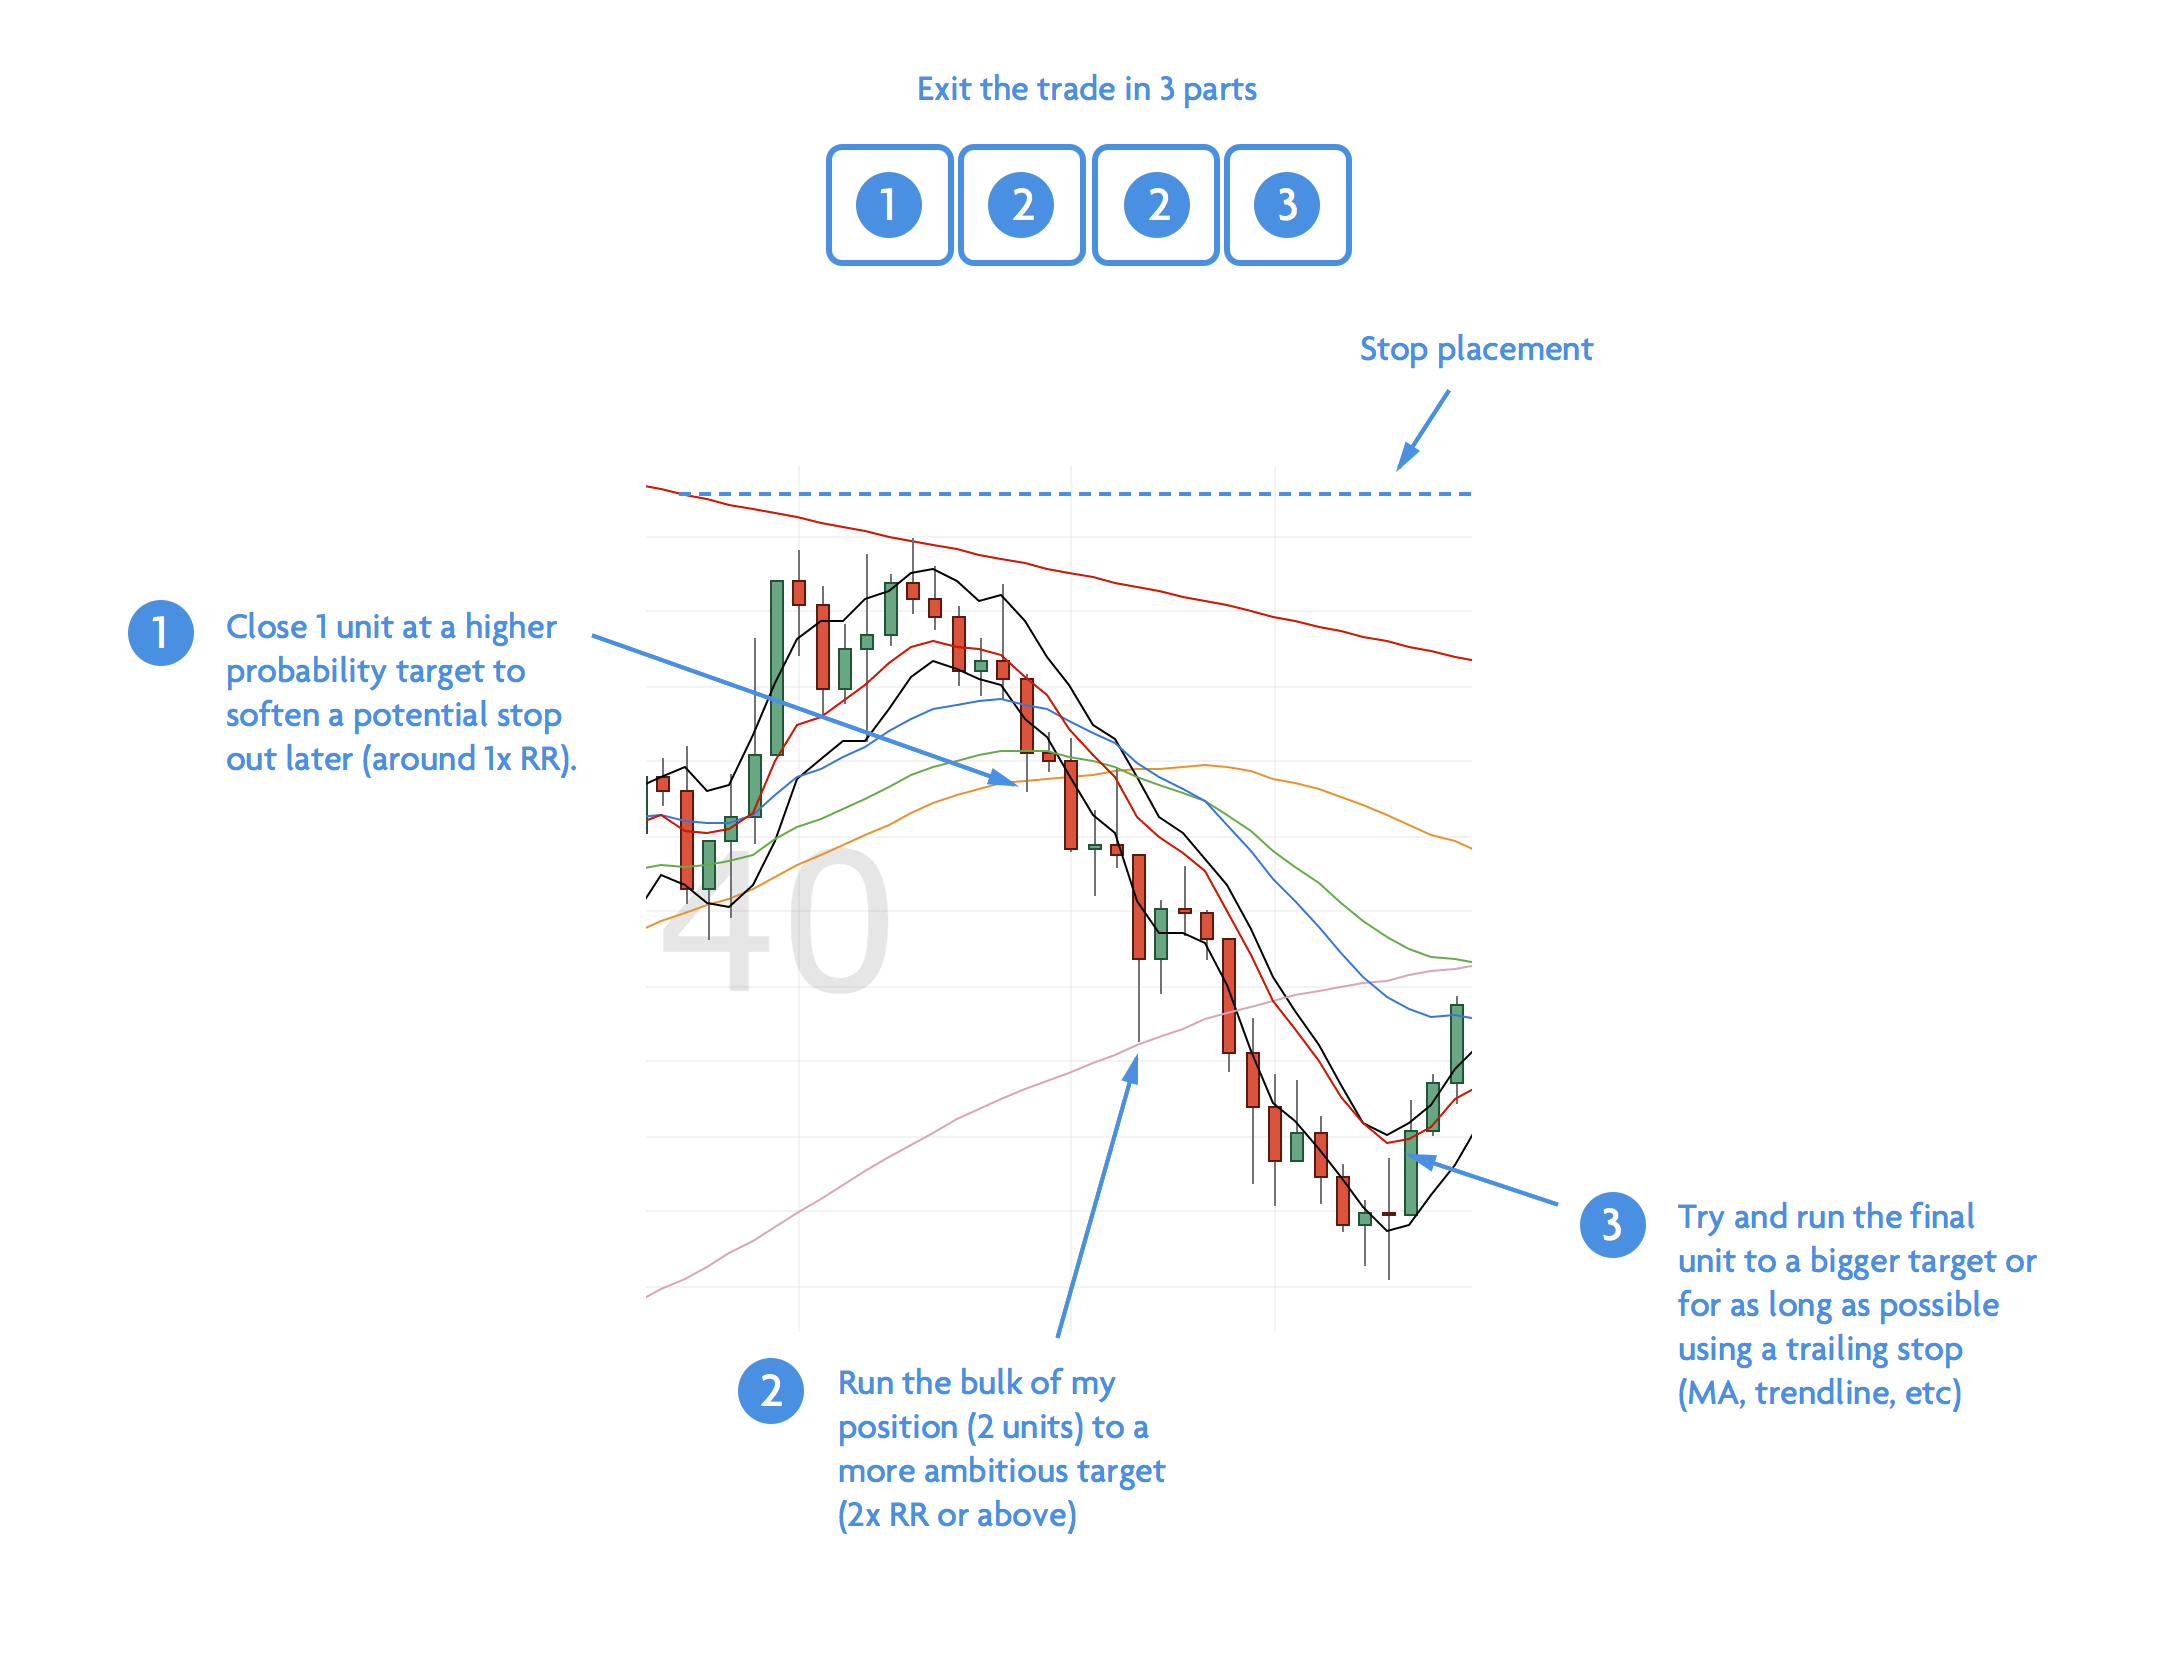
Exiting the trade in parts to be more flexible
The point is that by entering the trade with many units, you have the flexibility to pick several targets or even trail stop positions to try and catch a run.
This is where the MBT methodology comes in to get a feel for how the trade should be exited.